- Like
- SHARE
- Digg
- Del
- Tumblr
- VKontakte
- Flattr
- Buffer
- Love This
- Save
- Odnoklassniki
- Meneame
- Blogger
- Amazon
- Yahoo Mail
- Gmail
- AOL
- Newsvine
- HackerNews
- Evernote
- MySpace
- Mail.ru
- Viadeo
- Line
- Comments
- Yummly
- SMS
- Viber
- Telegram
- JOIN
- Skype
- Facebook Messenger
- Kakao
- LiveJournal
- Yammer
- Edgar
- Fintel
- Mix
- Instapaper
- Copy Link
 How to Get Strong, Defined, and Toned Shoulders
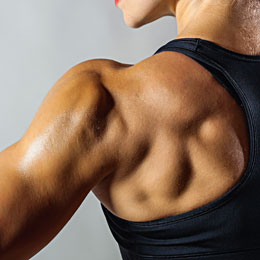
Sleek and sexy shoulders are a real show-stopper! Considered by many the crowning achievement of the upper body, having some lean shoulder development goes a long way toward transforming the whole look of your physique. However, there is a right way and a wrong way to go about shoulder workouts. This is a complex joint and a lot can go wrong if you don’t work them right or you utilize the wrong exercises. So stick with me to learn the best way to safely and effectively work your shoulder muscles to cap your shoulders with crowning glory!
The best shoulder workout for women needs to work the shoulder muscles and related muscles from multiple angles using different types of exercises. It’s important to focus on shoulder strength and function, not just the aesthetic quality of the shoulder musculature. The good news is that my best shoulder workout right here will address strength, function, AND aesthetics all in one workout. The types of shoulder exercises we’ll be choosing also work to help stabilize and tone the core when done correctly, so we’ll be going over the best ways to engage the core when working the shoulders.
 A little disclaimer is in order: Please know that NO workout will burn body fat SPECIFICALLY off the targeted body part. I see some women going through shoulder workouts in an attempt to burn fat directly off the upper arms and the little pooch many of us have next to the armpit. Fat loss is a whole-body activity, and spot reduction is nothing more than a stubborn fitness myth. That being said, as you’re working to lose body fat (if that is your goal) working the shoulders is still an important part of the picture for your fitness and the tone of your upper body muscles.
In addition to teaching you everything you need to know to complete the Spectacular Shoulders workout, I will go over essential tips for integrating shoulder workouts into your total fitness plan, cardio programming for muscle building and fat loss, and tips and tricks for getting the most out of your shoulder workouts. Ready to begin? Read on!
The Spectacular Shoulders Workout for Women
 Here we go ladies: it’s time to learn the essential exercises you need to do, the proper order in which to do each exercise, and tips and guidelines for getting maximum impact out of every repetition. We’ll go over Warm Ups, Main Events, and Finishers to make sure your shoulders are safely yet thoroughly worked out. First, let’s start with a few pointers and programming considerations:
Tips and Guidelines for the Best Shoulder Workout for Women:
- Do the workout exactly as written; don’t mix and match or switch up the order
- Do the Warm Up first, followed by the Main Events, and concluded with the Finishers
- Complete the Finishers only after completing your desired number of Main Events
- No wimpy weights; pick a weight that you can safely control but that really wears you out by the end of your set
- Safety is the key to sustainable results! If you’re unsure how much weight to choose at first (and it will vary for everyone), start on the lighter side and add more next time if it’s too easy
- Complete this workout twice or three times weekly for maximum results
- Rest at least 48-72 hours in between shoulder workouts; for example Monday/Wednesday or Monday/Thursday is a go, but not Monday/Tuesday
First Things First…Getting Warmed Up!
 General Cardio Warm Up: Before you do ANY workout, shoulder or otherwise, you need to get warmed up first. The first type of warmup needs to be a general cardio warmup of about 5-10 minutes. The purpose of this is to get your heart rate elevated and pump blood to your muscles and connective tissues to get ready for lifting weights. So take a brisk walk or hit the elliptical, ARC trainer, or AMT for 5-10 minutes when you first walk in the door. If you are combining the shoulder workout with other workout, there’s no need to do the general cardio warm up again, but you should always do the following specific shoulder warm ups directly before beginning shoulder exercises.
Specific Shoulder Warm Up
- Shoulder circles back – 10
From a tall standing position, simply roll your shoulders up and then back and down. Watching from the side, someone would see you drawing a little circle in the air with your shoulder.
- Arm circles back – 10
Upping the game on the shoulder circles, now start taking your entire arms in big circles as you keep them straight. Circle backward like you’re doing a double-armed backstroke. As an added bonus, get more rotator cuff involvement by touching the backs of your hands together as you circle in front of your body, then opening your palms up to the sky as you sweep overhead and then down to your sides.
- Kettlebell Halo – 10 each direction
Because you’re such a perfect little angel, you’re going to draw yourself a little halo. Get a light kettlebell or dumbbell, 5 or 8 pounds to start, and hold it in front of your face in both hands. Circle the weight back past your ear, around the back of your head, and back to the front. Make most of the movement come from circling your shoulders and not just your forearms or wrists.
On to the Main Events!
Once you’re properly warmed up, it’s time to hit up the major shoulder exercises. Do two sets of each of these exercises, resting thirty seconds to one minute in between sets. If you’re more advanced and going real heavy, you may want to add a longer rest break between sets to allow enough muscle recovery time. Let’s do it!
#1. Shoulder External Rotation with Dumbbell – 15 each side, 2 sets
Shoulder external rotation is a powerful exercise for stabilizing your shoulder complex, specifically some key muscles in your rotator cuff. This helps prevent shoulder injuries in the future especially if you plan on lifting weights (which, obviously, you do!). It’s also good for upper body posture.
To do a set of shoulder external rotations:
Grab a light dumbbell between 3 and 8 pounds, depending on your level of experience. Lay on your side with your head supported on your bottom arm. Hold the dumbbell in your free hand with your forearm resting straight along your body. Rotating from the upper arm, open the forearm up and and away from your body. Go to a comfortable range of motion, stopping before you feel anything pinchy or uncomfortable. Keep a 90 degree bend in your elbow at all times. As you go through your set, you will feel a funny burning sensation building in a ring around your upper arm. That’s what it feels like to isolate your rotator cuff! Pretty cool! Flip over and do the other side too. Then complete an additional set on each side for a total of two for each shoulder. There’s no real need to rest between sets on this one because one shoulder will be resting while the other one is working; by the time you finish the set on one side, the other will be recovered enough to get worked again.
#2. Rotating or Standard Dumbbell Overhead Press – 15 reps, 2 sets
Overhead or vertical pushing is an essential functional movement pattern, and the rotating overhead press is a great choice because it takes your deltoids and rotator cuff through a more full range of motion that the straight up overhead press. Some call this overhead press variation the “Arnold” press.
To do a set of rotating overhead presses:
Depending on your level, you may want two dumbbells anywhere from 5 pounds to upward of 15 or 20 pounds. As always, start on the low side until you know for sure how much you can handle. Hold the dumbbells close in at shoulder level with your palms facing your chest. Stand with a firm hip width stance. Tighten your core and squeeze your glutes as you press the weights straight up overhead, twisting your upper arms and hands as you press so your palms end up facing outward at the top of the rep. Make sure to keep your core tight so your ribcage doesn’t tip back on you. If you can’t press the weight without your ribcage tipping back uncontrollably, that’s your cue to swallow your pride and choose a lighter weight to finish the set. Lower the weights slowly and under control back down to the starting position. Since you’re working both arms at the same time, take a rest at the end of your set for 30-60 seconds or longer if you’re lifting super heavy. Complete a second set when you’re ready.
#3. Shoulder Side Raise – 15 reps, 2 sets
The shoulder side raise is such an abused exercise in a bunch of different ways. The sad thing is that it’s super effective when done right, while it can cause injury and exacerbate posture problems when done wrong! Let’s make sure you get it right so you can reap the benefits of the shoulder side raise. It’s truly great for sculpting your delts!
To do a set of shoulder side raises:
You’ll want anywhere from 3 pound to 10-15+ pound dumbbells depending on your level. Again, start low; your shoulders are nothing to play with! Stand strong with feet hip width apart. Hold the dumbbells at your sides with palms facing your thighs. Keep a slight bend in your elbows and your arms coming slightly toward the midline as you raise up ONLY to shoulder level. It should look like you’re hugging a great big giant invisible tree. Go slow and use control; don’t fling your arms up and don’t flop them down. Keep your shoulder blades retracted back toward your spine and your shoulders themselves pressing down, being careful not to let the shoulder complex elevate toward your ears. Rest a good 30-60 seconds between your sets.
#4. Back Fly – 15 reps, 2 sets
Back flys are an outstanding exercise for sculpting the rear aspect of your deltoids as well as your midback. They’re also super beneficial to your upper body posture. There are several different ways to do back flys; exercise machine, free weights, resistance bands, even the TRX suspension trainer. Since the machine is pretty self-explanatory (plus not as beneficial) and not everyone has access to a TRX, I’ll focus on the free weight version in this workout.
To do a set of back flys:
Grab a couple dumbbells, anywhere from 3 pounds to 10+ pounds. Hunker down into the bottom of a deadlift position, weight sitting back into your hips, back flat, chest parallel to the floor, and knees strictly above the ankles. Keeping a tiny bend in your elbows, lift your arms up to a T-shape parallel to the floor coming straight out from your shoulders. See if you can feel the backs of your shoulders and your midback driving the movement. Squeeze your shoulder blades and midback together as your arms come up. Use care and caution NOT to elevate your shoulders toward your ears or “turtle” your head forward as you lift up. If you find you can’t do the movement without doing these little goofs, get a lighter weight. Keep your chest low and avoid the temptation to rise up above parallel with the floor. After your set of 15 is done, rest 30 to 60 seconds before doing additional sets.
BONUS: Military Press
If you’re a purist, you may be asking, “but…but…where is military press?” It’s true that the military press is a classic shoulder exercise and it’s great for developing raw vertical pushing strength. I didn’t include it in this workout because it’s simply not the best use of your energy if your goal is sculpting toned shoulders, and improving posture, two of the most common goals I hear from women who want to learn shoulder exercises. If you do want that raw pushing power, though, by all means do a few sets of military press.
To do a set of military presses:
If you choose to work the military press, I recommend doing it early on into your shoulder workout so you have plenty of juice, as it’s quite a demanding lift. Do it after external rotation and before rotating overhead press. Strict military press form requires you to stand with your heels close together and your toes pointing out, unlike the hip width stance I taught you in the other shoulder exercises. Grab a barbell with an overhand grip. Standing with heels close in and toes out removes the ability of your lower body to assist you at all in pressing the weight up there, demanding that the shoulders and upper chest do it all on their own. Holding a barbell at chest level with vertical forearms and straight wrists at all times, use your shoulders and upper chest to press the bar straight up overhead. Be sure to keep your chin tucked in so you don’t smack your chin or nose as you press the bar! Really, you need to kind of move your head around the bar to push the bar on the correct straight vertical path and maintain good form. Lower the bar evenly and slowly, focusing on how your muscles need to work to control the bar on its way back down to its starting position at your chest, again making sure you keep your head and face out of the way as the bar traces a path straight downward, not arcing out at all.
Finish Strong: Two Shoulder Finishers
After you have completed two to three sets of each of the Main Event exercises, move on to the finishers to really burn out your shoulders and bring completion to the workout. Thought your shoulders were tired after the Main Events? Well, the Rotating Side Plank and Forearm Plank finishers will really give your shoulders something to cry about (in a good way)!
#1. Rotating Side Plank – 12 reps each side
The rotating side plank is a demanding exercise not only for your shoulders but also your core, especially your oblique abdominals. Incorporating this exercise into your finishers not only helps polish off your shoulder work, but strengthens the core in a major way. Twisting core exercises done properly also help prevent back injuries. What’s not to love about the rotating side plank (aside from the fact that it burns like nobody’s business)?
To do the rotating side plank:
Get on your side and prop up on the flat of one forearm, making sure to stack your elbow right under your shoulder. You’ll be balancing on the outside of one foot at a time. If that’s too hard, put your knee down and work from the side of your knee instead. Either way, from a side plank position with your head held evenly and your neck straight, use your free arm to reach down in front of your ribcage and into the space beneath as far as you can, slightly twisting your ribcage under. Then open your ribs and your free arm back up to the original position. Take care not to collapse the shoulder that is supporting your weight. FOCUS and keep it firm and strong as you rotate. You’ll feel this exercise in your shoulders, abs, hips, and even legs. If it’s too demanding for you at first, work on it by simply holding a side plank.
#2. Forearm Plank – Hold to form fatigue, 2 sets
A good old-fashioned plank hold will not only finish your shoulders off real nice at the end of a tough shoulder workout; it will ensure that your core gets a last blast as well.
To do a forearm plank:
Get down on your belly and prop yourself up on your toes and the flats of your forearms, palms down or in fists. It’s called a plank because you want your body to be straight as a board. Squeeze your glutes and pull your belly up and in, making sure your hips don’t lift above the line and your core doesn’t sag below the line. Since we’re talking shoulders today, I’ll point out that shoulders are often neglected, totally collapsing in many people’s planks. This will not be you! Keep your weight pressed along your forearms and your shoulders pressed in toward your body, shoulder blades retracting toward the spine. “Hold to form fatigue” means hold it until you can’t maintain perfect alignment any longer and you need to take a rest. For some, this will be ten seconds, for others, this will be 60 seconds or more. Rest assured that working the plank to your personal point of form fatigue, even if it’s just ten seconds, is a productive use of your time and you will improve as you get stronger!
Working Shoulder Workouts into Your Fitness Program
 Even the very best shoulder workout does not comprise an entire upper body training program. I recommend doing this shoulder workout as part of your upper body training day 2-3 times per week, or alternatively, blending this workout into a full body strength training plan that you will work through 3-4 times per week. A good upper body day will include chest, back, shoulders, and any arm isolations that are particularly important to you. On the opposite days, be sure to work legs/lower body, ensuring enough work for the thighs, glutes, and calves. My other workout articles will be very helpful to learn the best workouts for those body parts too!
Be sure to give your shoulders at least 48 hours off between sessions. Overworking the shoulders is a great way to start getting injuries, because your muscles will be too fatigued to work properly. So no matter what workout scheme you decide on, make sure the shoulders get worked, for example, Monday/Wednesday, Monday/Thursday, or Monday/Friday, or any variation that gives them 48 hours off.
Additionally, you need to take at minimum one active rest day per week. Active rest means walking, stretching, yoga, and other light activities are great, but weight training is off the menu.
CARDIO Programming for Muscle Building and Fat Loss
 The majority of women working hard in the gym are looking to cut at least some body fat while maintaining and building lean muscle. If this describes what you’re about, the following cardio notes are for you.
When you’re looking to cut body fat, you need the right balance of strength training and cardio. If you’re reading my strength training articles, you’ve already got that part down. As far as cardio is concerned, I’ll keep it simple and let you know some basic cardio recommendations: for general health, adults need a MINIMUM of 90 minutes of vigorous cardio spread out over the week. For fat loss, you would want to shoot for at least 120-150 minutes of vigorous cardio each and every week and even more if your cardio is moderate, such as walking.
Treadmill, ARC trainer, elliptical, AMT and spin bike are all good choices if you’re doing your cardio in a gym setting. Hiking, power walking, jogging, running, cycling, and dancing are good choices if you don’t like to do your cardio 100% in the gym. Just remember that the intensity and the amount of time are BOTH factors to consider. Don’t slack on the cardio, but don’t over-focus on it to the exclusion of strength training.
Best Shoulder Workout for Women: The Bottom Line
How did this workout treat you in your quest for spectacular, sculpted shoulders? How are your shoulders looking, feeling, and how much weight are you pressing up there? Did we miss any of your favorite shoulder sculpting tips or exercises? We love when our readers talk back, so let us know in the comments below!
About Mae Barraclough
Mae Barraclough, B.S., NASM-CPT, NASM-CES is a certified personal trainer, corrective exercise specialist, and licensed Zumba Instructor. With her passion for health, fitness, and dance, Mae loves learning all she can and sharing her knowledge with others.

